Well, here it is: possibly the gear-nerdiest thing I’ll ever buy. The Tarptent ProTrail Li. Yeah, I spent that much on an ultralight tent.
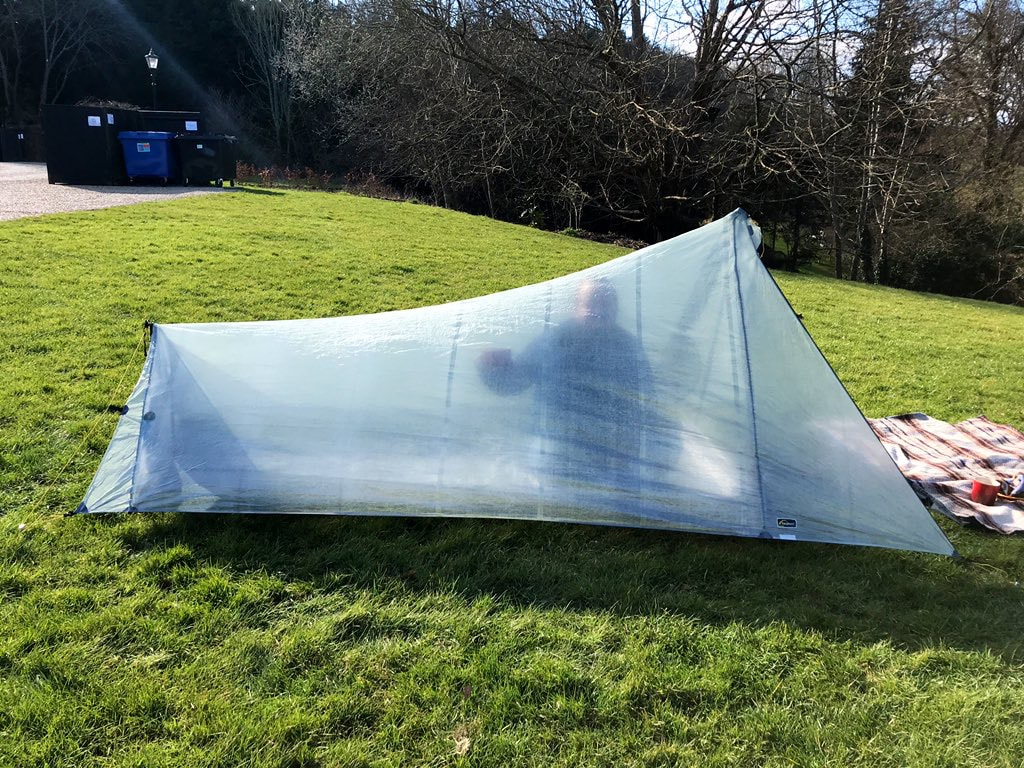
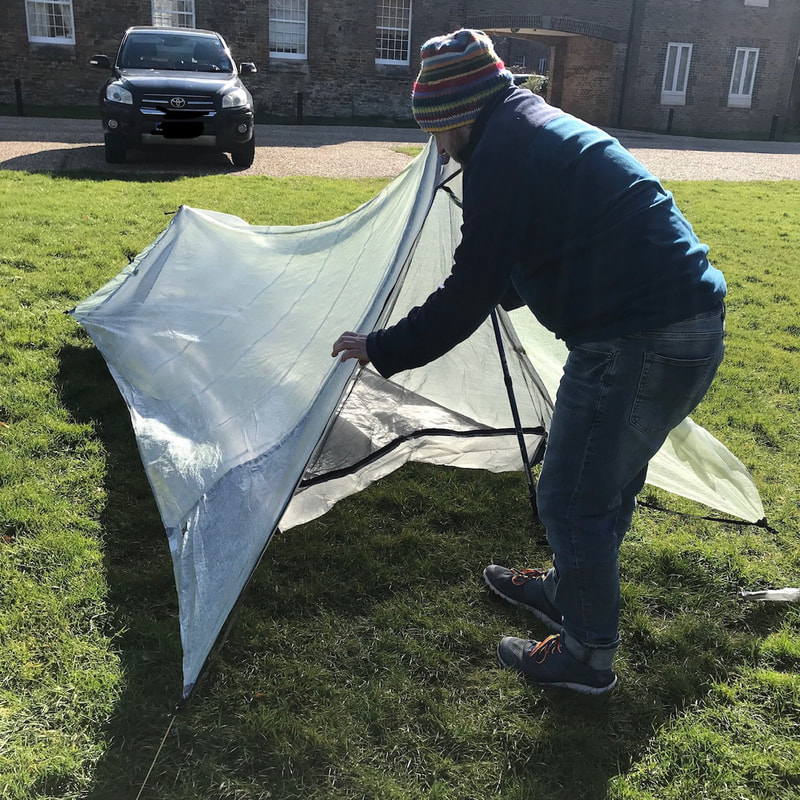
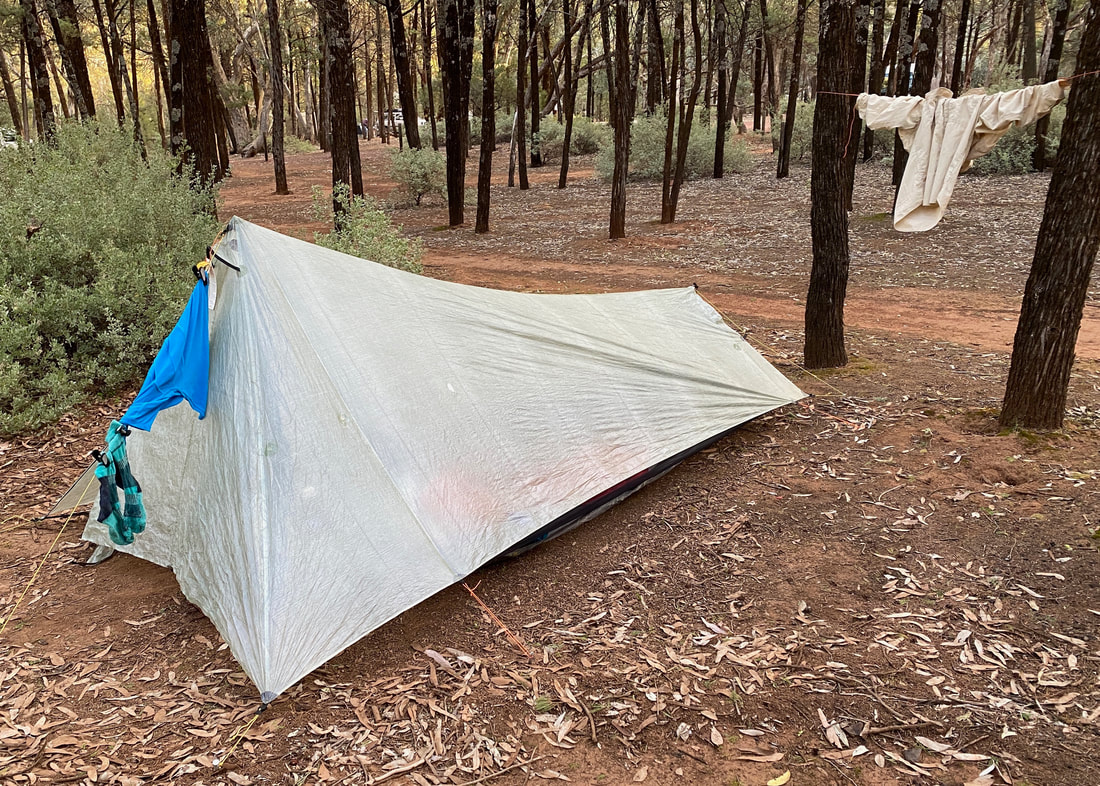
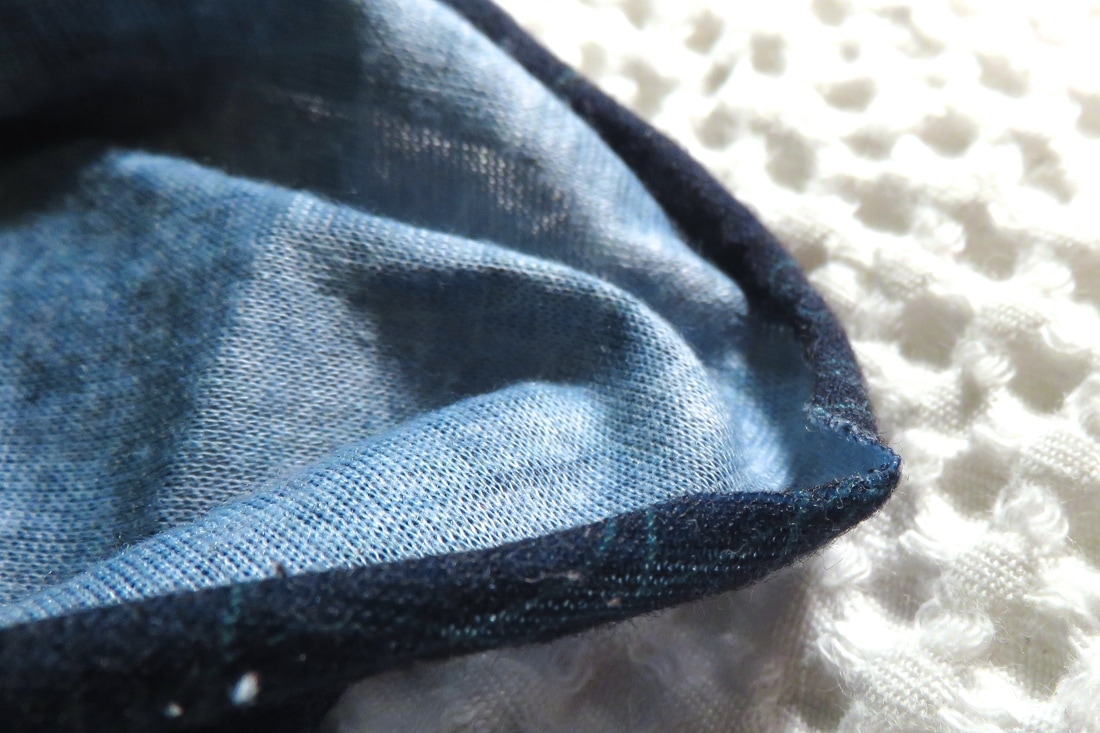
First time setting up the tent. The stripes are where blemished DCF has been taped for durability. Please enjoy the bins in the background.
This will eventually be a comprehensive review, as I didn’t find too many when I was researching. (NB: Here's a thread from Australian owners, which might be useful to others considering this tent.) I will add to the review (and add more pics) as I spend more time with/in the tent. If you have questions that I don’t cover here, feel free to leave a comment and I’ll try to answer it. What I won’t do is give my own weight measurements, as I don’t have a sensitive scale. If you’re wanting the specs, they are on the Tarptent website. In brief, the tent weighs a bit over 450g, not including stakes, extra cords, etc.
Pre-ProTrail Li life
Before I get into the realities of the shelter, I thought I'd share some of the considerations and concerns I had before getting the tent. For other people thinking about it (or a similar tent), I hope this might help. Also, I thought a lot about it, and what's the point of all that agonising if I don't record it?!
Do I really need another shelter?
There’s a reason I didn't buy a 1 person tent sooner. Between the two of us we already have:
Do I really need another shelter?
There’s a reason I didn't buy a 1 person tent sooner. Between the two of us we already have:
- A 2.5 person, 2.8kg tent Wild Country Aspect (which we use for car camping)
- A 3 person, semi-freestanding, 1.7kg Alpkit Ordos (which we use when we are walking together, e.g. on our Snowy River trip)
- A Rab Siltarp 2 flat tarp and two Alpkit bivvy bags (often used in conjunction for solo or duo overnight walks in the UK)
Why this tent?
I wanted something:
I also wanted to try something in Dyneema (aka DCF, aka Cuben Fibre). Dyneema has really taken off in the USA with hikers and in the cottage industry of ultralight gear as it is super lightweight, tough and extremely waterproof. It doesn’t sag in the rain, which is one of my pet peeves with pretty much every shelter I’ve used, and it doesn’t wet through.
For ages, I’ve been looking at all the Zpacks tents on hiking YouTube and pondering the pros and cons of designs. The Duplex is kind of a classic, and I thought I might eventually go for that. I held off because it was so expensive and because Zpacks customer service has an … uneven … reputation, which is not something I wanted to deal with if I was having issues with a tent while in another country. And then I heard whispers that Tarptent was now doing Dyneema versions of their tents. I headed over to their website and the ProTrail Li (ProTrail = the design, Li = Dyneema version) immediately caught my eye. I’d been saying to Dan that what I wanted was “basically a tarp with bugproofing”, and this seemed to be it.
I wanted something:
- Really light - lighter than my current tarp combined with a separate bug net
- Simple - not many things to go wrong, no extra struts needed, a design I could understand
- One piece - no pitching an inner then an outer or vice versa
- Pitched with hiking poles - a simple way to save weight, and I’ll always have them on me if doing a long walk
I also wanted to try something in Dyneema (aka DCF, aka Cuben Fibre). Dyneema has really taken off in the USA with hikers and in the cottage industry of ultralight gear as it is super lightweight, tough and extremely waterproof. It doesn’t sag in the rain, which is one of my pet peeves with pretty much every shelter I’ve used, and it doesn’t wet through.
For ages, I’ve been looking at all the Zpacks tents on hiking YouTube and pondering the pros and cons of designs. The Duplex is kind of a classic, and I thought I might eventually go for that. I held off because it was so expensive and because Zpacks customer service has an … uneven … reputation, which is not something I wanted to deal with if I was having issues with a tent while in another country. And then I heard whispers that Tarptent was now doing Dyneema versions of their tents. I headed over to their website and the ProTrail Li (ProTrail = the design, Li = Dyneema version) immediately caught my eye. I’d been saying to Dan that what I wanted was “basically a tarp with bugproofing”, and this seemed to be it.
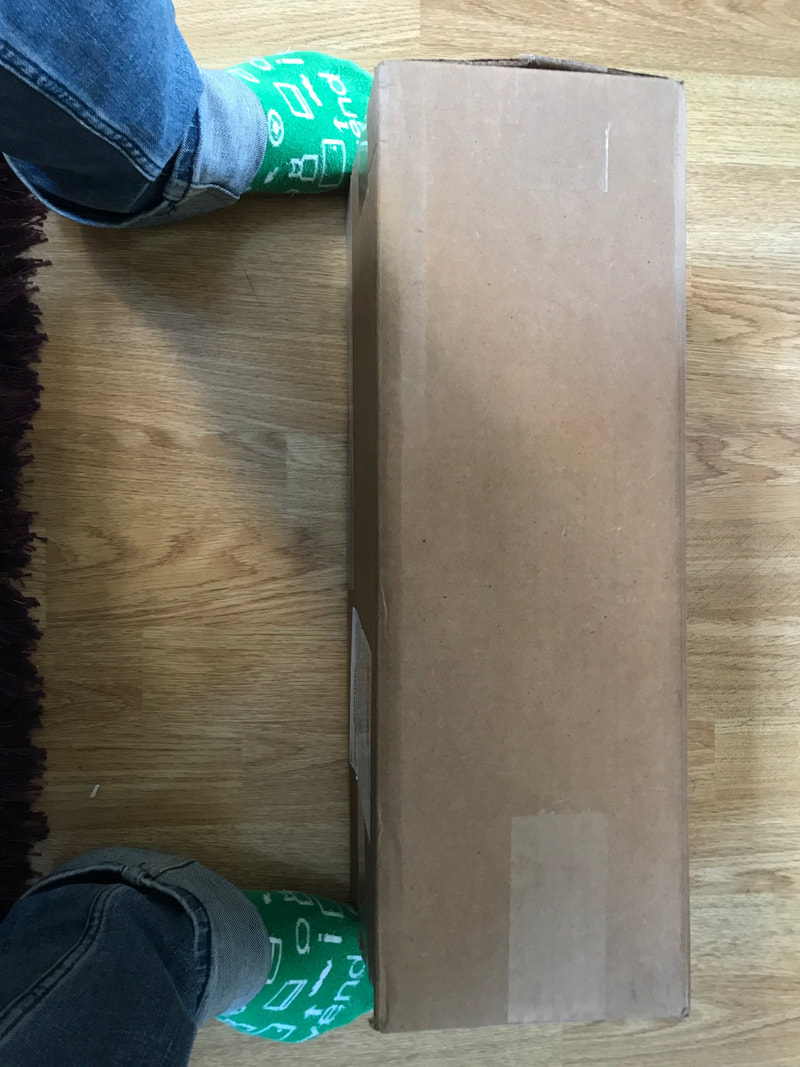 All the way from the USA! |  Here we go! (Should have swept the floor!) |
Considerations
Because the ProTrail Li is a relatively new tent and lots of people have been in lockdown since it came out, there aren’t that many detailed, longer-term user reviews. I specifically sought out critical reviews to help me understand the issues I might encounter. It’s an extremely expensive tent (for me), so I wanted to be sure. Here are the things people mentioned and/or that I specifically worried about, which you might want to consider when making your decision.
With all that in mind, I spent another week or two agonising over whether I should press the ‘order’ button...
Because the ProTrail Li is a relatively new tent and lots of people have been in lockdown since it came out, there aren’t that many detailed, longer-term user reviews. I specifically sought out critical reviews to help me understand the issues I might encounter. It’s an extremely expensive tent (for me), so I wanted to be sure. Here are the things people mentioned and/or that I specifically worried about, which you might want to consider when making your decision.
- Length and height. A lot of taller people worry about this, but I did not. (I am short - approx 165cm - and this is one of the only hiking-related benefits! The rest of the time, it’s all trousers/leggings/rain pants that are 30cm too long, rushing to catch up with long-legged friends, raincoats made for Mr Tickle… Oh, but I can just about curl up on a ¾ length sleeping mat, so that’s fun, too.) Anyway, I figured that I’ve spent enough time sitting under tarps at hiking pole height that it will be fine to sit at the front of this tent.
- Width. I didn’t see this mentioned as often. I’m a side sleeper who moves around a lot, and I was concerned that I would end up hitting the walls with my knees and feet and getting my sleeping bag wet with condensation. One reviewer said they sleep on their side with their arm outstretched and they had plenty of room for their arm at the wide/door end. This was helpful, but I was more concerned about the narrow/foot end. In fact, this was probably my biggest concern when buying the tent (having not seen it in real life).
- Livable room. Really a combination of the above, but also consider things like: if I’m stuck in the tent for a whole day and it’s absolutely pissing down, would I be comfortable? How will I get dressed/undressed? Is there enough room for everything I want to bring inside/under the vestibule? Can I cook while remaining sheltered from the rain? Where will I hang my socks to dry? Is there a pocket for my phone/book/glasses? The appeal of the ProTrail design is its simplicity and weight, but in comparison to something like the Duplex, you are getting less liveable space and fewer storage/hanging options.
- One piece set up. As noted, I wanted a tent that did not require separate erection of an inner and a fly - it’s easier, quicker, and less likely to get wet when put up in the rain. However, this means less flexibility in the pitch and no bug-net-only pitches for watching the stars!
- Condensation and ventilation. People say that condensation is more of an issue with single wall tents. I think it’s only more of an issue because it’s easier to hit the wet inside walls of the tent without another layer (of net or fabric) in the way. All the double wall tents I’ve slept in have had mesh overhead and ended up with just as much condensation on the inside of the fly/outer wall… only it’s harder to reach to wipe down. The ProTrail has a small-end storm window, which should help with ventilation, as well as having the net sides between the bathtub and wall. I’ll probably also keep the vestibule open when possible as I like to be able to see outside.
- Front/end entrance. Some folks have a very strong preference for a side entrance, a door that runs alongside your sleeping position, rather than an opening at the end. This is not a dealbreaker for me, especially if I’m solo and not having to negotiate entry/exit with another person, but if you're less flexible you might find it awkward.
- Packability. While Dyneema is super light, it doesn’t actually pack down as small as the same quantity of, for example, Silnylon. This can be an issue when you are carrying a smaller pack. TarpTent suggests that by folding and rolling the tent carefully, it will fit horizontally in most packs. We'll see!
- Transparency. The weight and type of fabric used means that the tent is translucent. From the photos and videos, you could definitely see the general outline of what was inside the tent. You would probably be able to tell if someone was clothed or not. I am not necessarily planning to use this tent in a busy campsite, but that’s something to consider.
- Other fabric issues. I've heard that Dyneema is noisy in the wind or when you move in it. Some people say it’s not actually that resistant to piercing damage (e.g. rocks underneath, twigs falling on the walls). Anecdotally, it deteriorates when left up in bright sunlight for too long. If you're getting any kind of lightweight or ultralight gear, you need to pay a bit more attention to treating it well and understand that it might not be as durable as equipment made from other materials.
- Hiking pole setup, not free-standing. If you don’t use hiking poles, you need to buy alternative poles for the tent setup. I use hiking poles (or don’t mind carrying them anyway). There is also a good argument for using a free-standing (or semi-free-standing) tent that will go up and stay up without being staked out. This is especially true if you’re going to be in places with very hard or very soft ground, for example. Unfortunately, the price to pay with all such tents is weight and size: you must carry poles for the tent. It’s a risk I’m willing to take… let’s see how that pans out!
- Pitch difficulty. A few comments suggested that the ProTrail Li is a bit more fiddly to get right than the non-Dyneema version. “Easy to pitch, hard to pitch perfectly,” seemed to be the vibe. This is something I worried about, because I get very irritated when my shelter is not quite right. However, I’ve also spent enough nights under dodgily pitched tarps to understand the difference between a pitch that is ugly-but-functional and one that’s flawed enough to collapse. I can cope (I tell myself).
- Wind and guy out points. Related to the above, some commenters had issues with this design in a cross-wind. The long side walls can cave inwards, pushing against whatever’s in the tent (and potentially blowing the outer wall over the side of the bathtub floor, emptying the rain straight into your living space - though I’m not sure if this has ever happened to anyone). Common mitigation suggestions are to find the right site, to angle the foot of the tent into the wind and to pitch everything nice and taut. Well, that’s easy enough to say, but sometimes you don’t have much of a choice where you set up and sometimes the wind changes direction. The tent has tabs where extra guylines can be attached on the long side walls, but these are located close to the head and foot of the tent, rather than in the middle (presumably because these are the points/seams that can take the stress, whereas the mid-point has no structural support). The guylines and stakes are not provided for this, but I have plenty of cord and stakes if needed.
- Cost. It’s an expensive tent. Shipping is expensive. Customs/import tax is expensive. But I couldn’t find a Dyneema tent closer to home or for less money. (Though if you’re in the UK some people have had luck - and a long wait - with TrekkerTent.) When I went to plce my order, there was a “Blem” version available - that is, a tent made with cosmetic blemishes in the Dyneema. These are taped to ensure durability, and it saves US$50.
With all that in mind, I spent another week or two agonising over whether I should press the ‘order’ button...
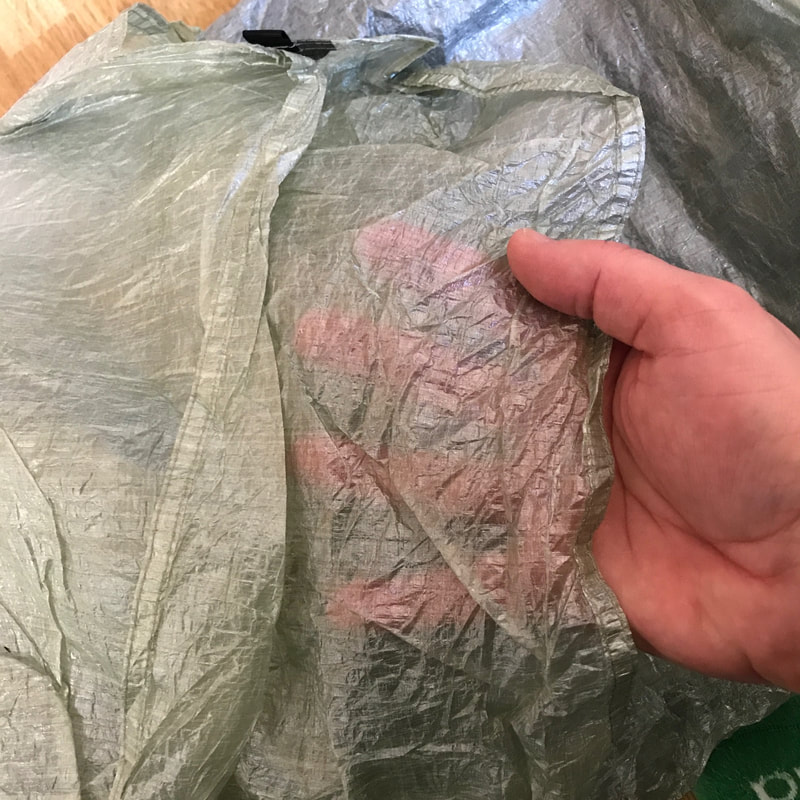
The tent material - you can see that it is translucent, but also how the fabric reflects some light, making it less see-through.
ProTrail Li: first (and second) impressions
Obviously, I bought the tent. And then I sat back to wait. I used the cheaper shipping option, expecting it to take a couple of months to get to me. But in the end, it took less than 2 weeks! I immediately set it up on the lawn. The next day, having mulled over some of the issues I encountered, I tried again.
Setting up and discovering which of our hiking poles no longer extends to the required front height!
A few thoughts on unboxing and pitching...
- It’s light! I mean, yes, this was one of the main draws, but it really is.
- The fabric is definitely see-through. Not transparent, but not something I would wear as clothes. It feels stronger than I expected - I thought I would feel like it was a leap of faith to trust it to hold up, but it isn’t bad. It’s also not quite as rustle-y or crunchy as I might have feared from some reviews.
- With the first pitch, it took a couple of goes to get the stakes in at an angle where the foot-end guyline didn’t slip off. These are the stakes from Tarptent. The next day, I used some of my other stakes on the corner guy lines, and they worked fine. Pretty impressive that it works this well with only 4 stakes.
- Hiking poles… one of mine no longer extends to 125cm, and the other is temperamental. Lucky only one of them needs to be that height! Perhaps this will be the push I need to finally get a new set of hiking poles. Also, while it’s possible to pitch with the rubber tips on, the poles then slip out of the grommets. Tip-free hiking poles it is, then.
 See how the cross wind blows the side in? (Mid-pitch) | 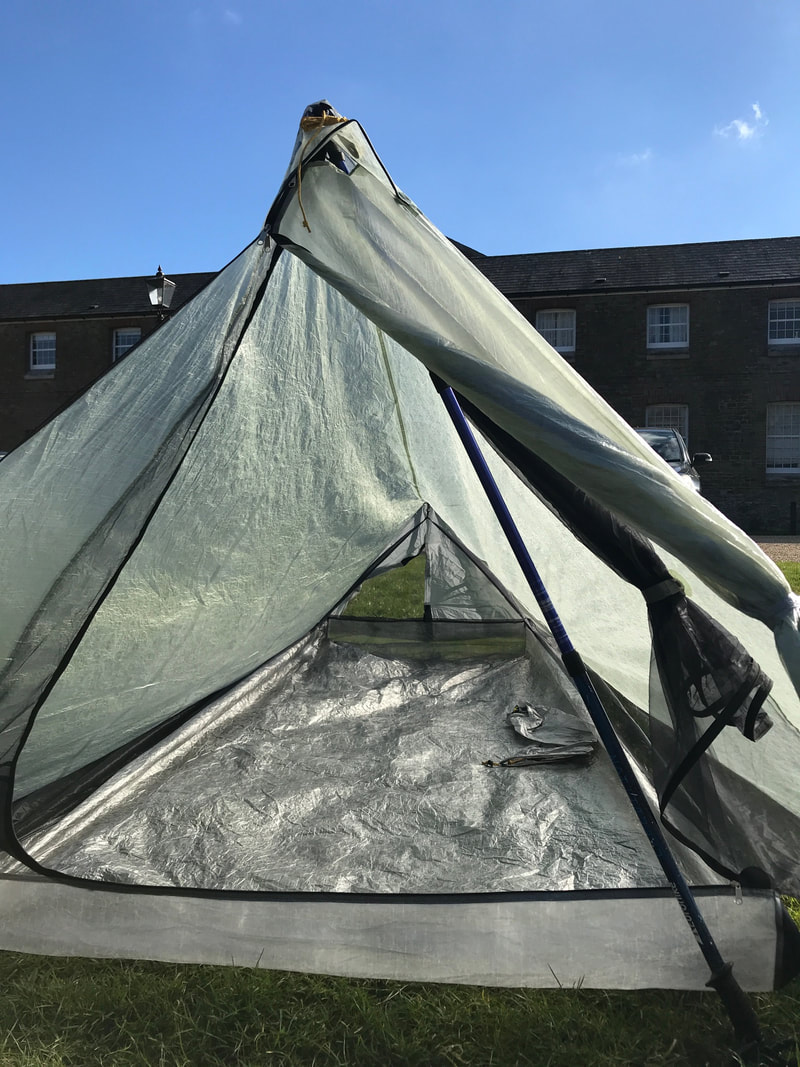 A gust of wind still blows the side inwards (after some fiddling). |
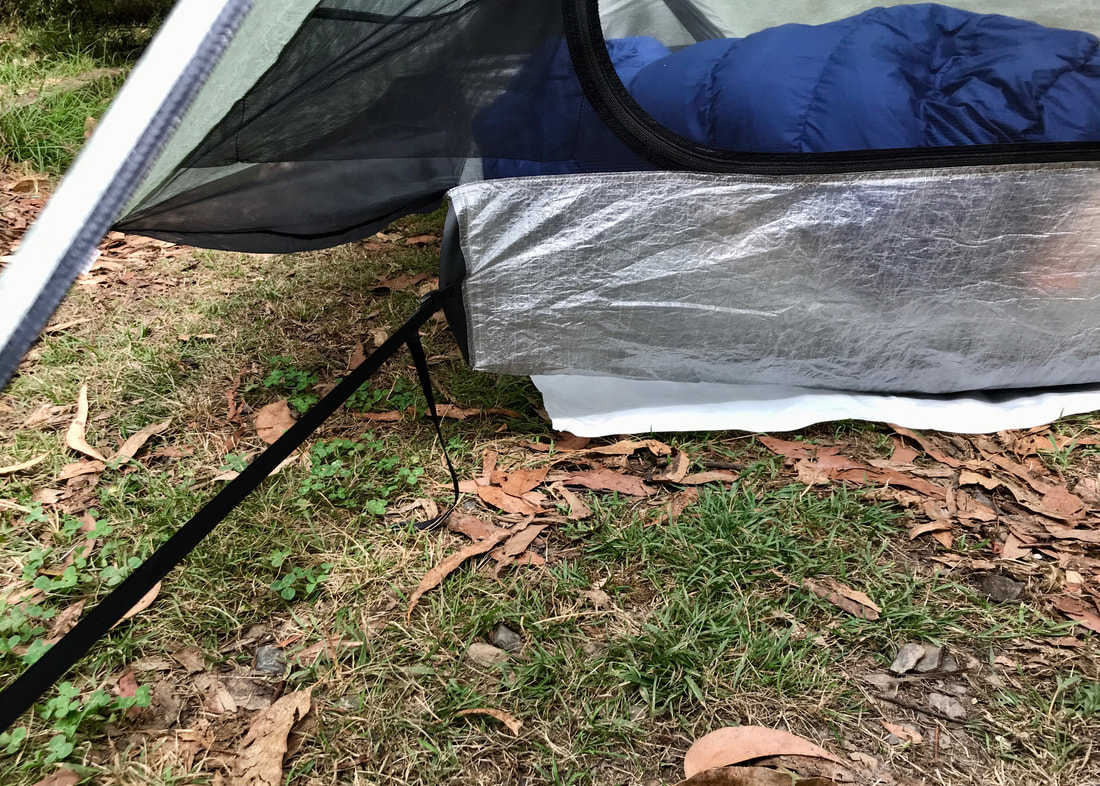
- The initial pitch (first time) was pretty quick and easy. However, I never quite got it to a point where I was happy with it. I set it up side-on to the wind, and no matter how much I adjusted it, I couldn’t get it taut enough to prevent the walls from caving/billowing. I also noticed that the bathtub floor didn’t stand up all the way down the sides - it kind of rolled over with the mesh that joins it to the outer. This could be an issue if something slips out onto wet ground, or if it’s flattened out and groundwater encroaches.
My first pitch! Not perfect, but not about to fall down. I was pleased!
- The second time I pitched the tent, I had a better idea of how the internal structure worked, and I paid attention to tensioning the bathtub floor as I set up. This resulted in a significantly tauter pitch, where the bathtub floor was much more defined (I still wish it was a bit higher all round, just for peace of mind). I also guyed out the apex point to improve the tension along the catenary ridgeline. There wasn’t quite as much wind, but the tent behaved much better with this pitch.
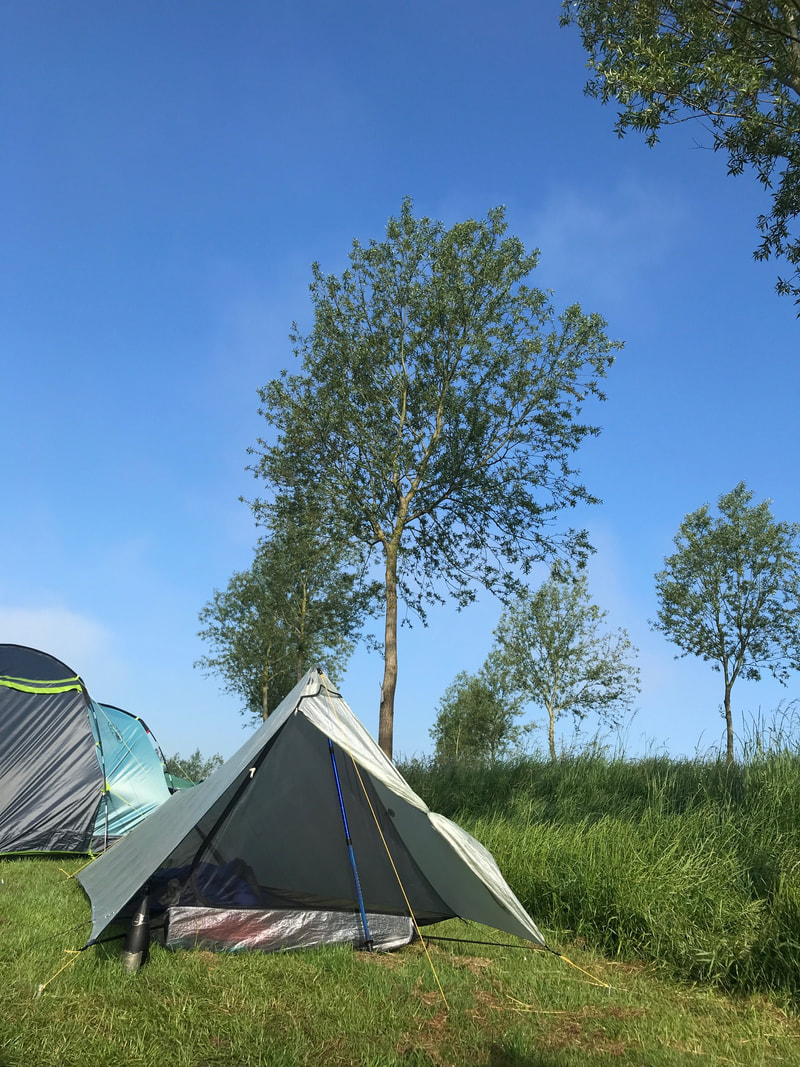
 Second pitch - better, even without side guy outs. | 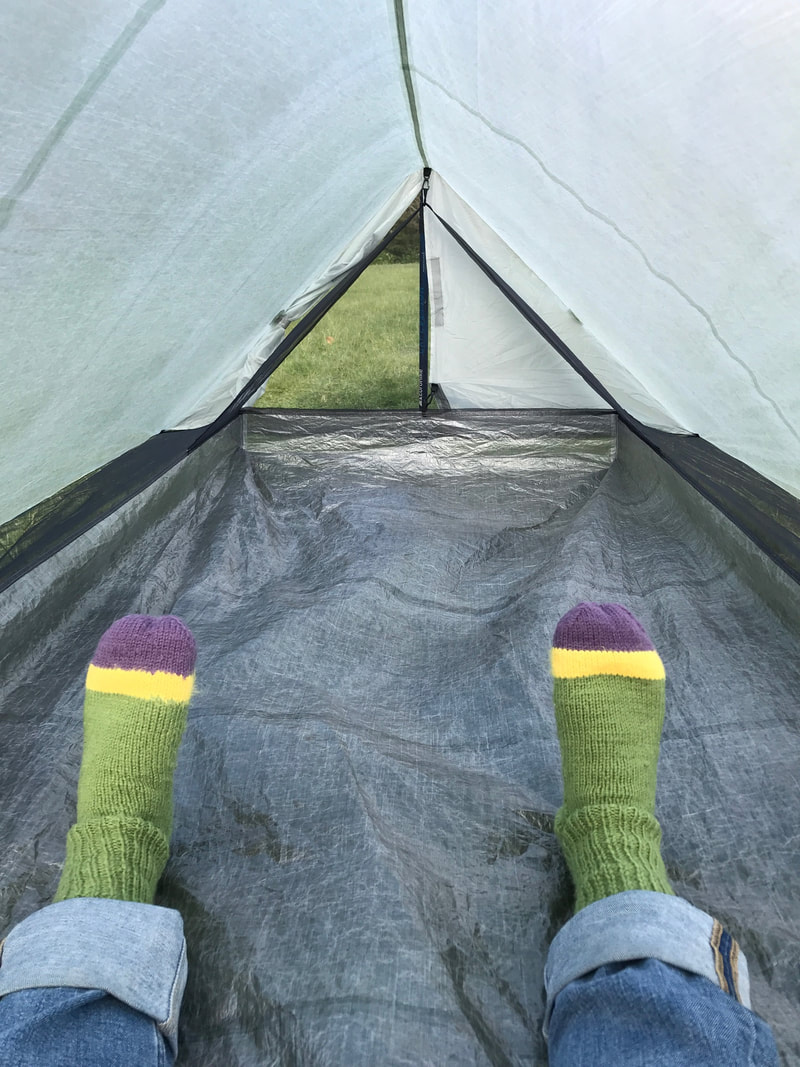 The mesh sides have much better tension. Thanks for the socks, Mum. |
- The second time out, I added a few simple, non-adjustable guy ropes (bowline knots either end) to the four additional tabs. Staking these out also helped with the wind issue, but I was a bit concerned about the amount of extra tension they put on the mesh seams in the corners, and the way they pulled at the corner mechanisms of the bathtub floor. Hopefully as I get better at pitching, I won’t really need these. I’ll also swap them out for lighter cord one day! One thing I've noticed is that I also need to pay attention to the height of the main pole. If it's not tall enough (or if the pole shrinks - I really need new ones!), it really affects the ability to get a good pitch at the door end.
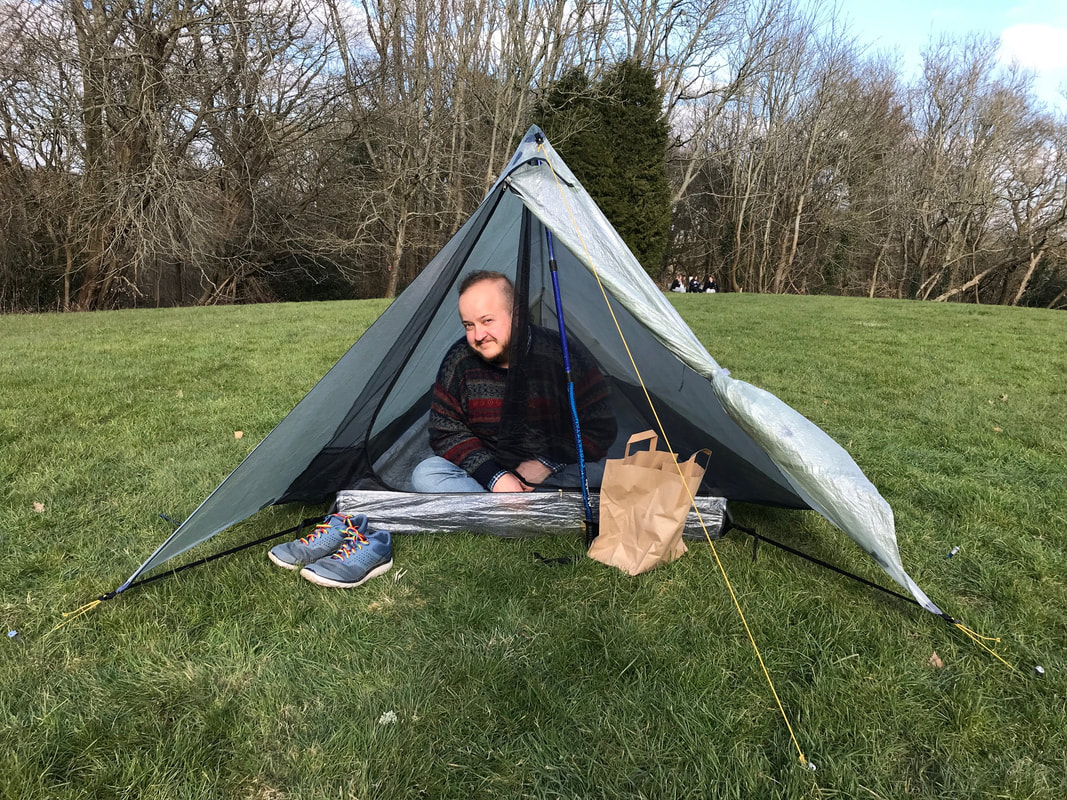
 Demonstrating how much head room I have when sitting. | 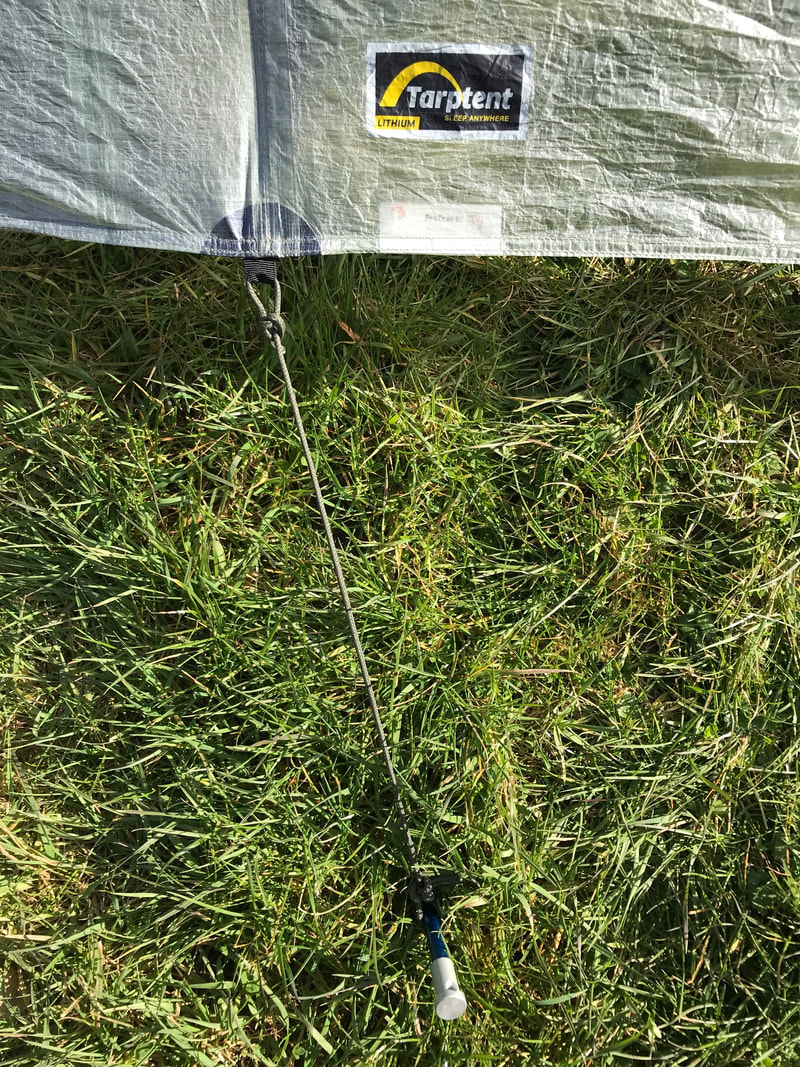 Temporary extra guy line. |
On the features and feel of the tent...
- There is plenty of room inside. I can sit up comfortably at the front, though I might hit my head on the sides if I was sitting on a thick sleeping pad (mine is not thick) or moving around a bit. It is wide enough to alleviate most of my fears about touching the walls - although not when the wind blows the sides in, as it did the first time. Handily, I can also fit the other way around, with my head at the lower end (though I need to wriggle/crawl to get in and out of position). This is helpful for when I need to pitch the low end into the wind, but when that also happens to be the slightly uphill end.
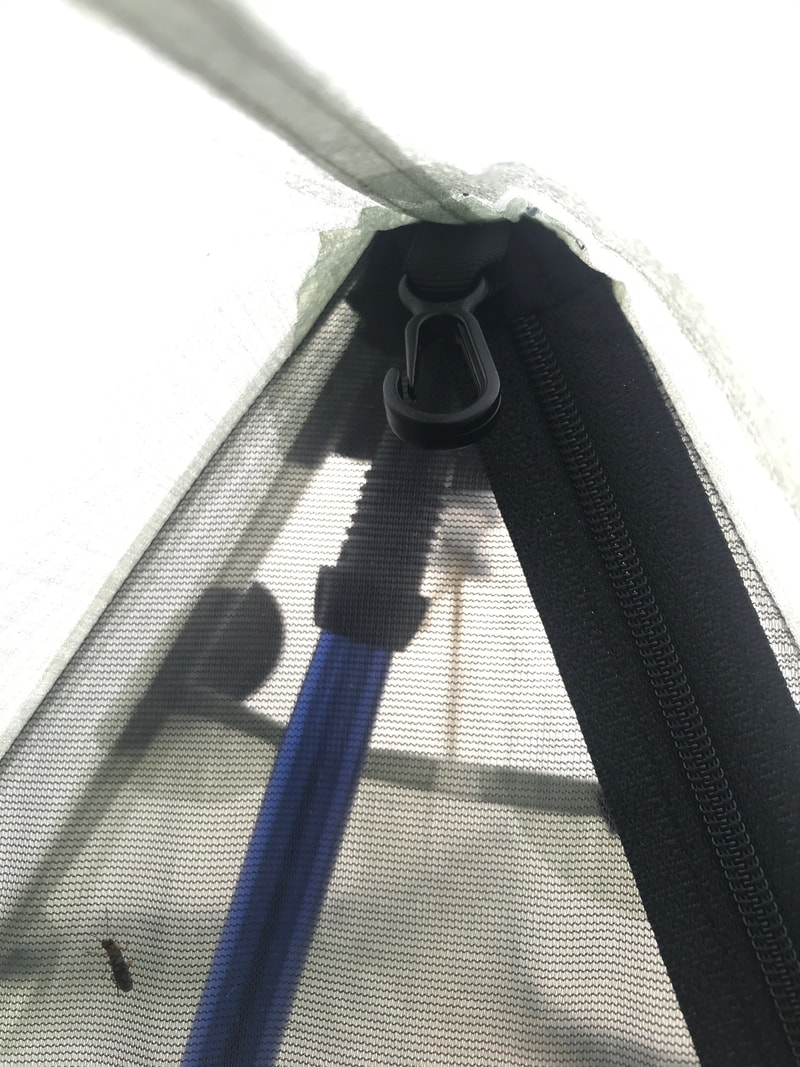
- I like the magnetic tie-backs on the doors. So much nicer than clips, toggles or velcro. Hope they hold up in the wind as needed.
- I love the storm flaps/end window design. It’s so clever to have the mesh on the outside so you remain fully enclosed. I’m not a huge fan of the velcro here where everything else is decent zips or cool magnets, but I think it’s to stop it popping open when everything’s tensioned to the max in a storm. Not sure what the material is on these flaps.
- The pocket is smallish - really not designed for much more than a couple of essentials. I'll take a photo in a future pitch to show how it's set up. It's easy to slip items between the pocket and the wall mesh and end up with them falling to/resting on the ground. Yes, I did this. Nice one, Jonathan.
- The floor doesn’t feel too slippery, though I haven’t put my sleeping pad and bag in to test it out. It actually feels better than the floor of our Alpkit tent, in this respect.
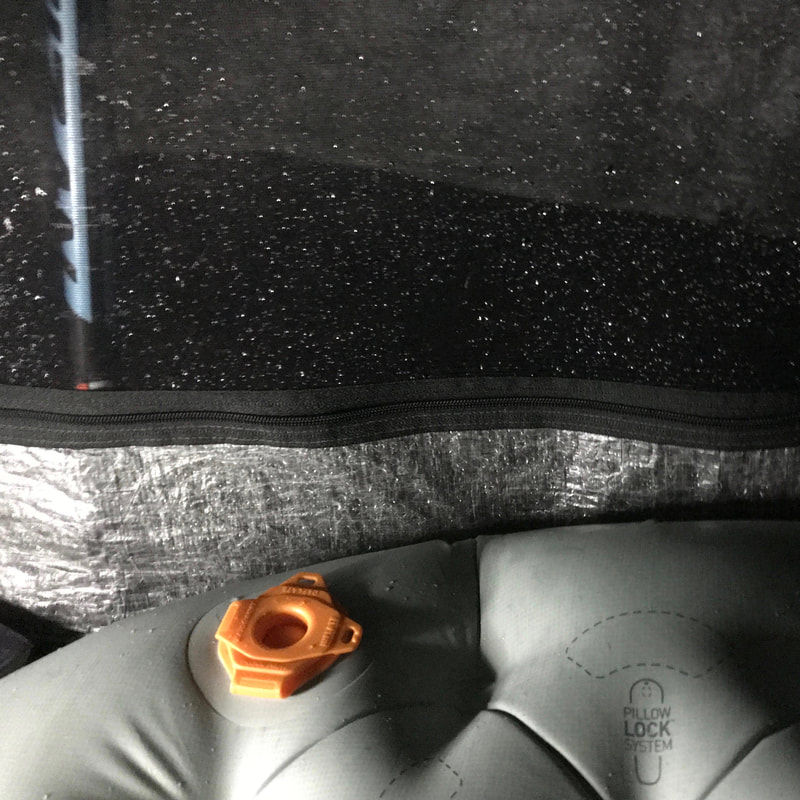
- I like the netting (feels sturdier than the mesh in our Alpkit tent, even though it’s allegedly the same stuff… maybe the manufacturer upgraded).
- The vestibule size is decent - it’s not a beak , but a straight-across door, which I quite like. I can see how running the front guy line under it (a hack I read in a few reviews) could help increase the space and tension (e.g. to make it quieter if needed). I didn't have an issue with the tension here, though.
- I opted for the 'cosmetic blemish' version of the tent (USD$50 cheaper) and there is more seam sealing tape than I expected. There are a couple of points that I am unsure about where it looks like maybe it should be taped but isn't. Can't really tell until I've had it out in the rain, though!
- It is very translucent in full sunshine (backlit). An exhibitionist’s delight, I’m sure. I will have to bear this in mind when around other people. This also means it doesn’t actually offer a lot of shade from the sun - not such an issue in the UK, but I might end up cursing it in Australia. We shall see! It's actually not that seethrough if the sun is behind the viewer, as the material reflects the light and the sheen helps.
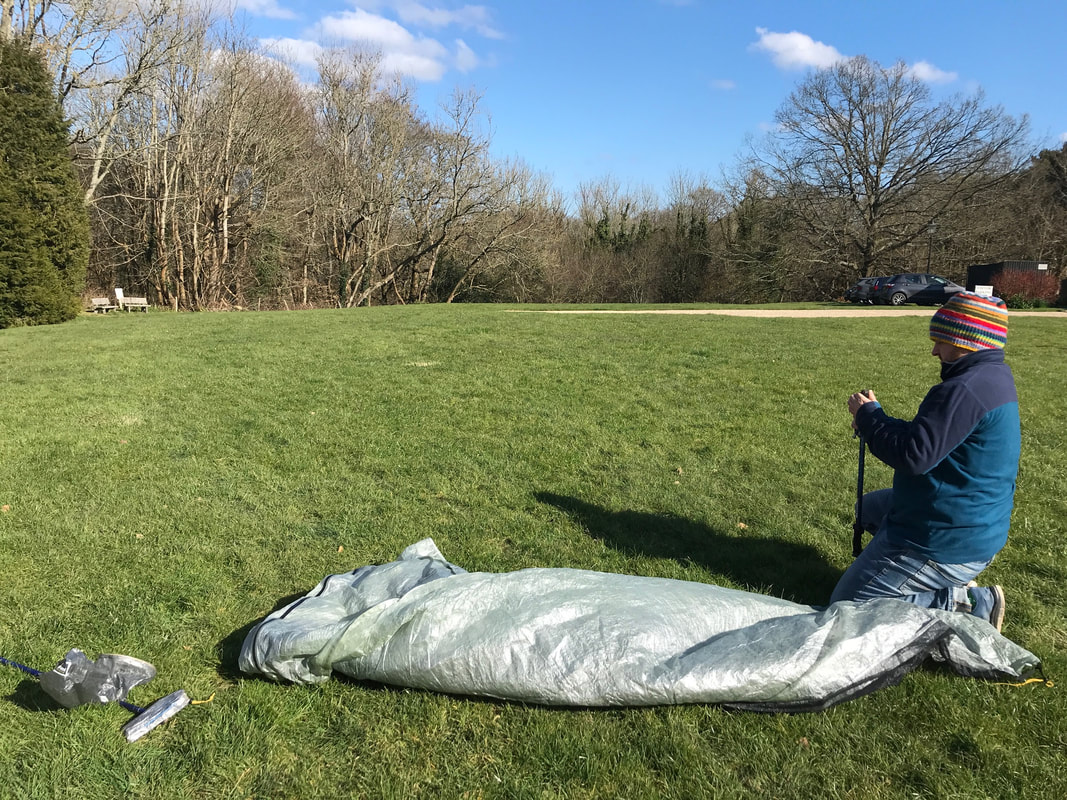
- The pack down is extremely quick and easy - faster than my tarp! When I was packing outside I didn't get it down to a size that would fit horizontally in my pack, but when I did it inside and focussed a bit more on it, it was fine. Quarters at the small end is about right, but I need to fold it again at the large end to keep the width consistent all the way up. This will be trickier in windy conditions.
Second pitch - better than the first. Getting the low end to the wind also makes a huge difference.
All in all, this was a successful start. I was pleased with my research, which had let me know what kinds of issues to expect (e.g. the wind, needing to practice/fiddle to get a really good pitch), and had given me a good idea of any limitations of the shelter. As I said, one of my main concerns had been about width/space, especially at the narrow end, but that seemed fine. I enjoyed being in the tent, and it felt like just what I wanted - a tarp with a bit of extra protection. I look forward to seeing how it goes when I’m using it for real!
Life with the ProTrail Li
FIRST OVERNIGHT TRIP
As promised - an update! My first overnight (technically 2 overnights) with the Tarptent ProTrail Li was in June 2021 at a well maintained campsite beside the River Rother. The weather was hot and dry during the day (good for swimming!) and very damp overnight (lots of atmospheric mist - no rain). There was a little breeze when I was setting up and very little wind after that. We were camping with friends and had the car, so I only had my sleeping gear and a few bits and pieces in the tent.
As promised - an update! My first overnight (technically 2 overnights) with the Tarptent ProTrail Li was in June 2021 at a well maintained campsite beside the River Rother. The weather was hot and dry during the day (good for swimming!) and very damp overnight (lots of atmospheric mist - no rain). There was a little breeze when I was setting up and very little wind after that. We were camping with friends and had the car, so I only had my sleeping gear and a few bits and pieces in the tent.
 Shiny and new in the sun! | 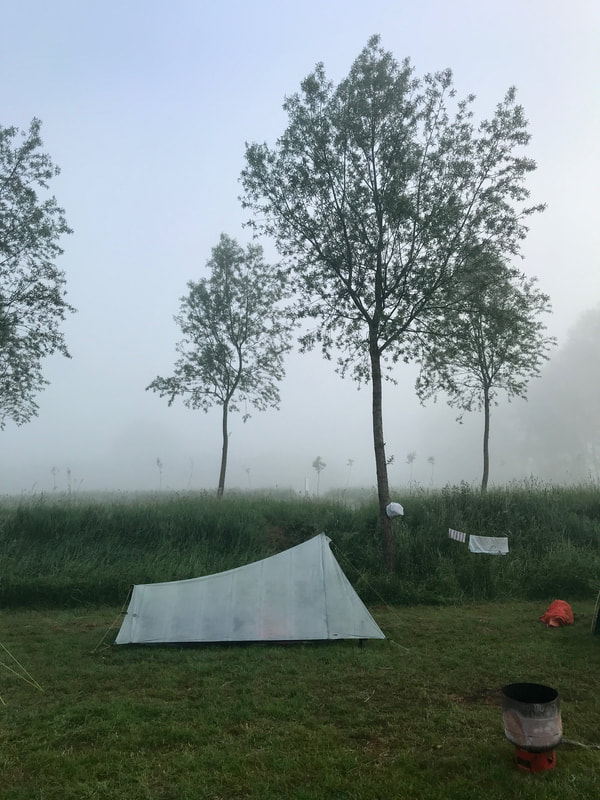 Not quite so shiny in the very misty morning... |
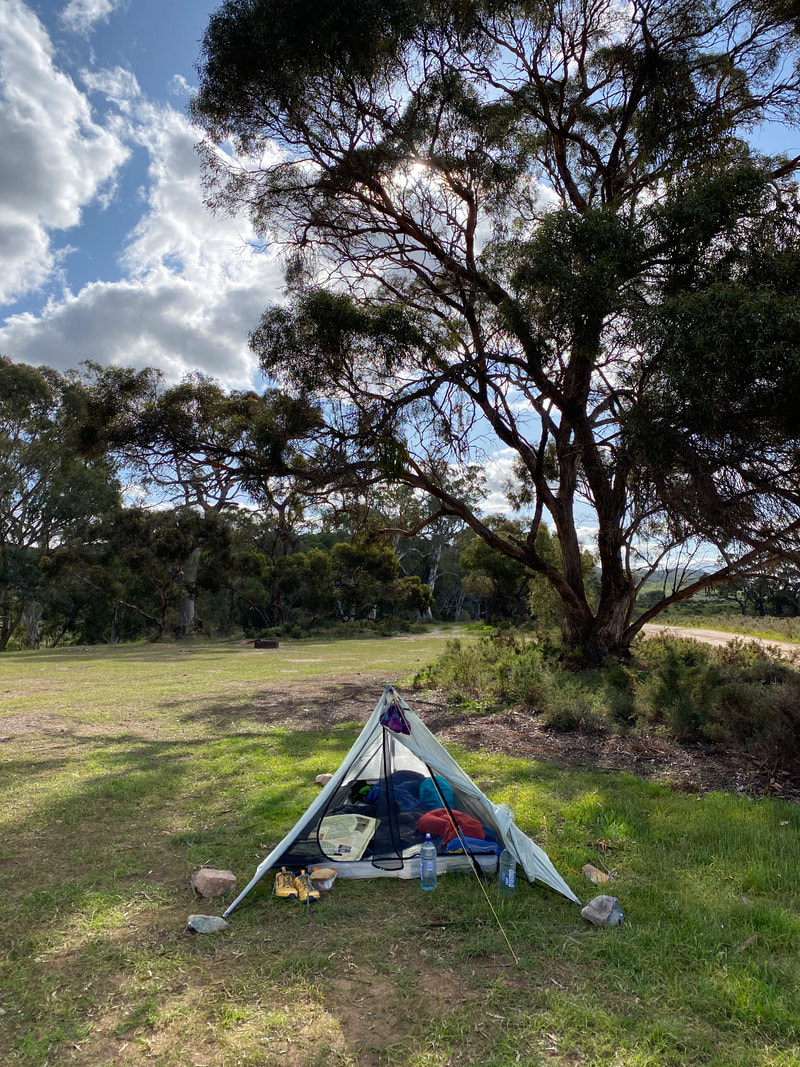
I achieved a good pitch, as I had plenty of time to work on it, the ground was flat and the grass was short. I pitched with the low end into the wind (by holding the foot end of the tent and letting it blow in the direction it wanted). Having practiced pitching another couple of times after my initial post, I have decided that extending the front pole to around 130cm (rather than the 125cm recommended) helps make the bathtub floor a little more tub-like. I used the front guy-out and a couple of the side ones due to the breeze when pitching, but I probably didn’t need the side ones. I think using the front one helps get a tauter ridgeline.
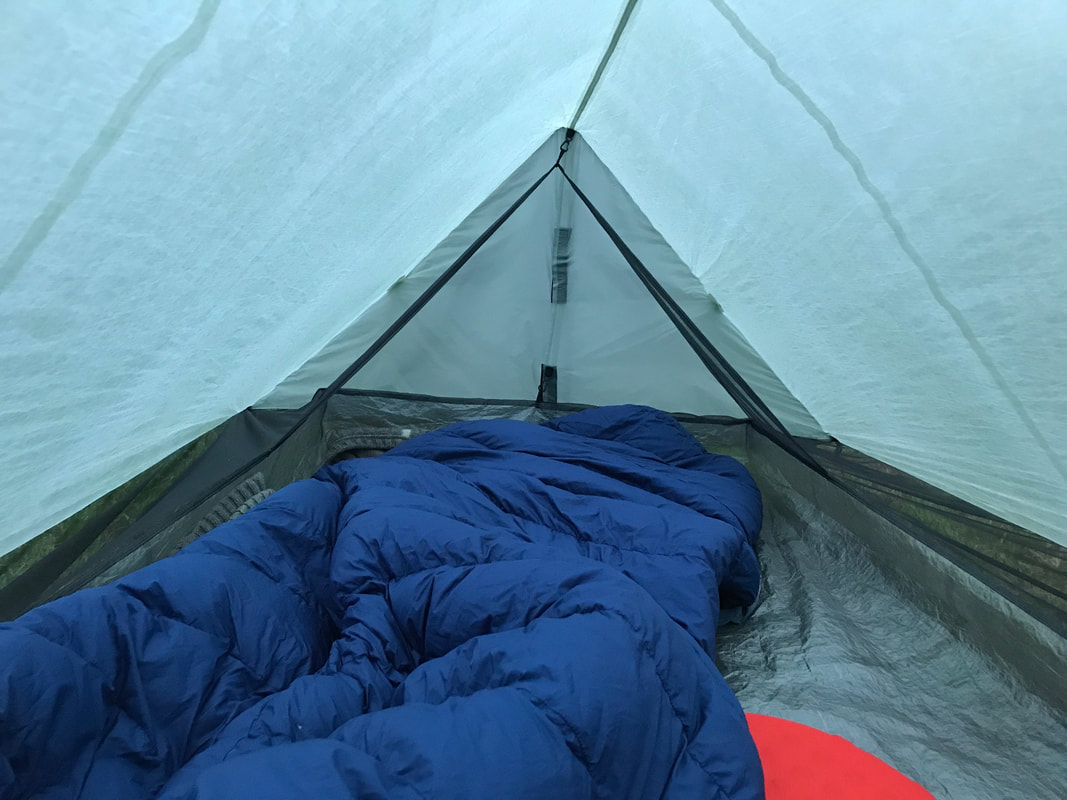
Looking towards the foot of the tent, showing the space available. (The sleeping mat is 3/4 length.)
The combo of campsite location and weather meant that there was condensation inside and outside the tent before I even got into it. However, the tent is wide enough that this wasn’t an issue for me or my sleeping bag - I didn’t really brush up on the inside very much. This was a concern of mine, so I’m pleased with the outcome. There was not enough condensation to drip down the inside, so I’m still not sure how well the mesh would work. The tent dried off very quickly in the warmth once the sun was out.
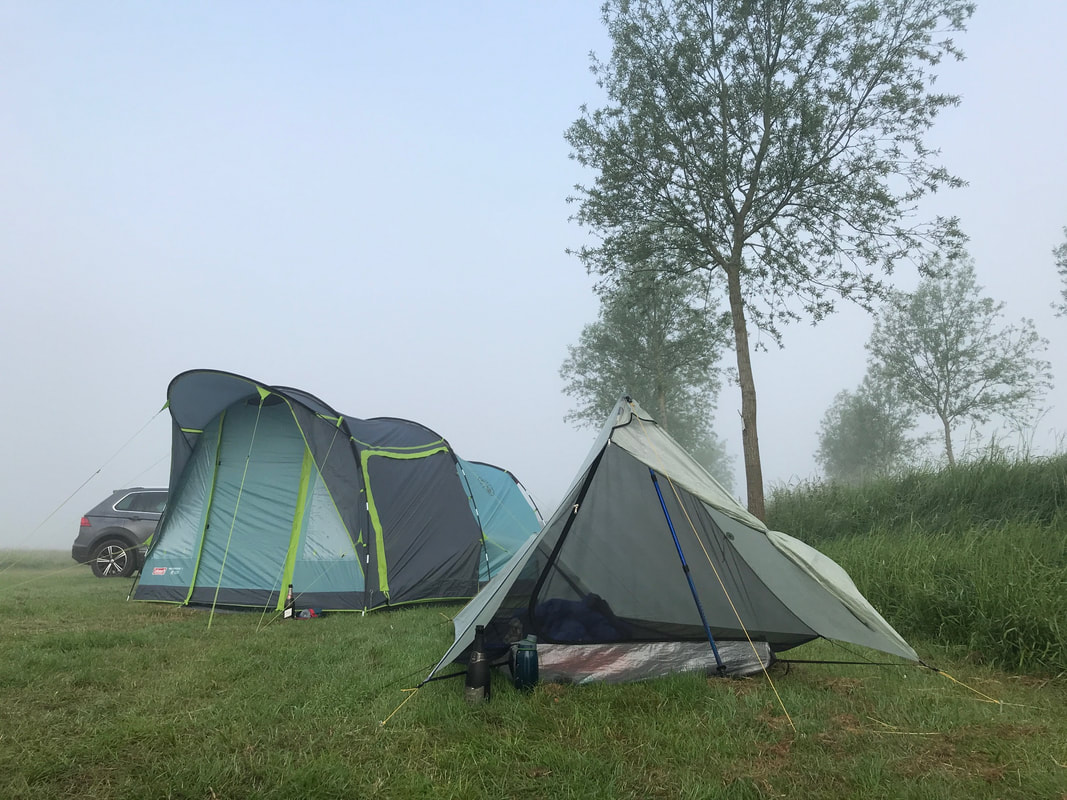
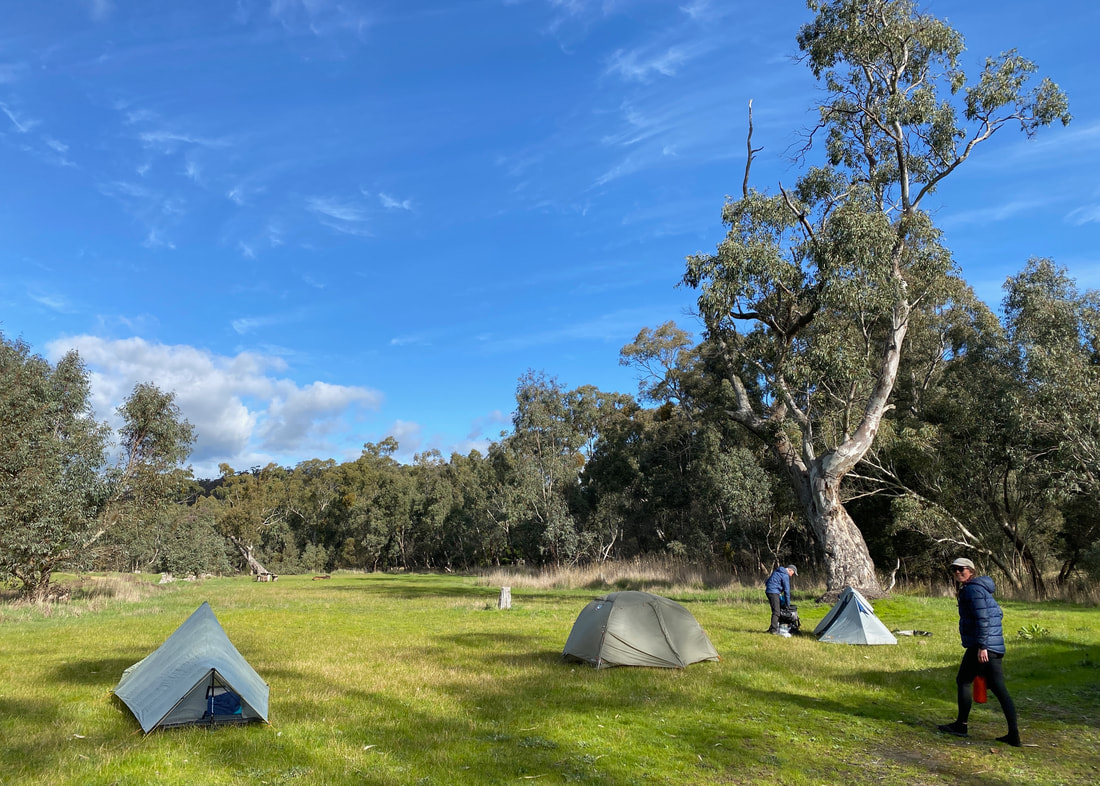
Forever amused by the size difference. To be fair, our friends' tent was nowhere near the biggest on site!
SECOND OVERNIGHT TRIP
My second overnight was the following weekend when I went on a D of E practice expedition with some students and teachers at my workplace. The weather forecast was for heavy rain and thunder all afternoon and evening, but in reality we only had a couple of hours of solid rain at the end of the walk and when we were first in camp. There was barely any wind. The campsite had longer, slightly tufty grass and was beside some sort of waterway (we could hear it) and nature reserve at the foot of the South Downs. I left my wet shoes and bag in the enormous foyer of one of the other tents (could have fit my ProTrail Li in that foyer at least twice over!), but had my sleeping gear, food and clothes in with me. (Also, I carried the tent in my bag for the hike during the second outing, standing it lengthways in my pack - not sure if I'd get it to fit horizontally without a bit more time/energy/patience when rolling it up!)
My second overnight was the following weekend when I went on a D of E practice expedition with some students and teachers at my workplace. The weather forecast was for heavy rain and thunder all afternoon and evening, but in reality we only had a couple of hours of solid rain at the end of the walk and when we were first in camp. There was barely any wind. The campsite had longer, slightly tufty grass and was beside some sort of waterway (we could hear it) and nature reserve at the foot of the South Downs. I left my wet shoes and bag in the enormous foyer of one of the other tents (could have fit my ProTrail Li in that foyer at least twice over!), but had my sleeping gear, food and clothes in with me. (Also, I carried the tent in my bag for the hike during the second outing, standing it lengthways in my pack - not sure if I'd get it to fit horizontally without a bit more time/energy/patience when rolling it up!)
 Set up and running out of daylight at 8:30pm. | 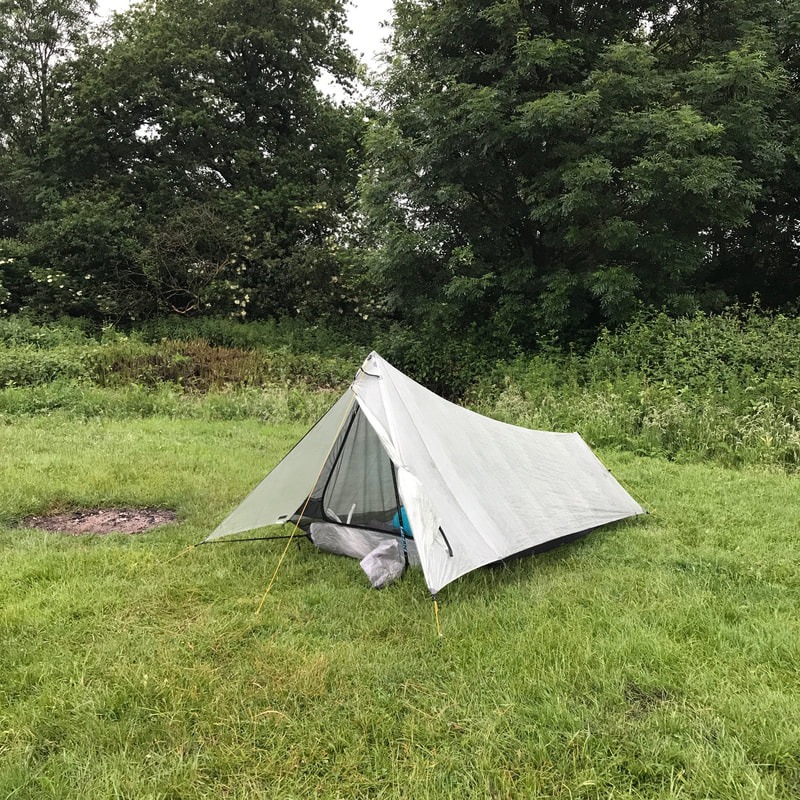 I think the pitch looked better on this side than the other... |
My pitch wasn’t as good this time, probably because it was drizzling and getting dark, and the campsite wasn’t as level. I used my new (birthday) trekking poles, and I think I might need to extend the shorter one a bit to get a better pitch as it’s a few centimetres shorter than my old ones when collapsed. I used the front guy out and also staked the front two extra guy outs for good measure (again, probably didn’t need them). While it wasn’t the best looking pitch, it did the trick. I didn’t get wet and I was relatively comfortable. I also used the clip above the door to hang my torch as I was getting ready for bed, which worked well.
 A hook for hanging things. And a bug. | 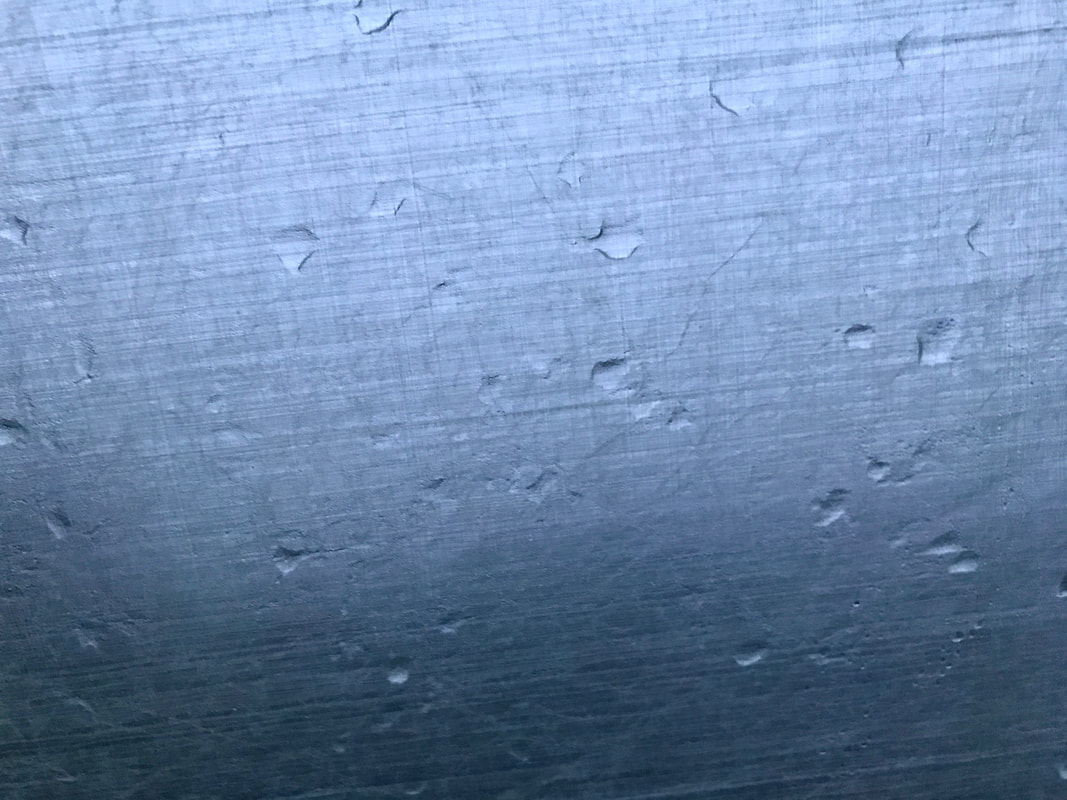 Showing raindrops on the outside (from inside). |
The only reason I didn’t scamper off into the luxury of one of the bigger tents on offer was that I wanted to test the ProTrail Li in the wet. In the end there was only a brief shower overnight. I did notice that (with my dodgy pitching), some water ran off the outer then ran along the mesh before dripping down, but it didn’t come inside. With more things in the tent and long grass distorting the floor I was more prone to pushing down the sides of the bathtub, which is something to keep an eye on in future. We didn’t have the time (or the weather) for me to leave the tent up to dry out, so I had to pack it wet. When I took it out at home, the tent bag had lots of water in it - but none had got into my bag... the tent bag is also made of DCF and living up to its waterproof reputation!
So, I've now had the tent out in damp and rainy conditions and it's been fine. I keep forgetting that I'm used to a tarp and so most of the issues I'm encountering (e.g. making sure not to wriggle around too much and end up on wet grass) aren't new. Anyway, so far, so good.
So, I've now had the tent out in damp and rainy conditions and it's been fine. I keep forgetting that I'm used to a tarp and so most of the issues I'm encountering (e.g. making sure not to wriggle around too much and end up on wet grass) aren't new. Anyway, so far, so good.
TWO NIGHTS IN THE BUSH
My first Australian outing in the Tarptent ProTrail Li was at the start of March 2022, at a bush campground on Wurundjeri Country near Kinglake, Victoria. The first night was warm, still and muggy. The second night had very heavy rain almost all the way through, but was also quite still.
My first Australian outing in the Tarptent ProTrail Li was at the start of March 2022, at a bush campground on Wurundjeri Country near Kinglake, Victoria. The first night was warm, still and muggy. The second night had very heavy rain almost all the way through, but was also quite still.
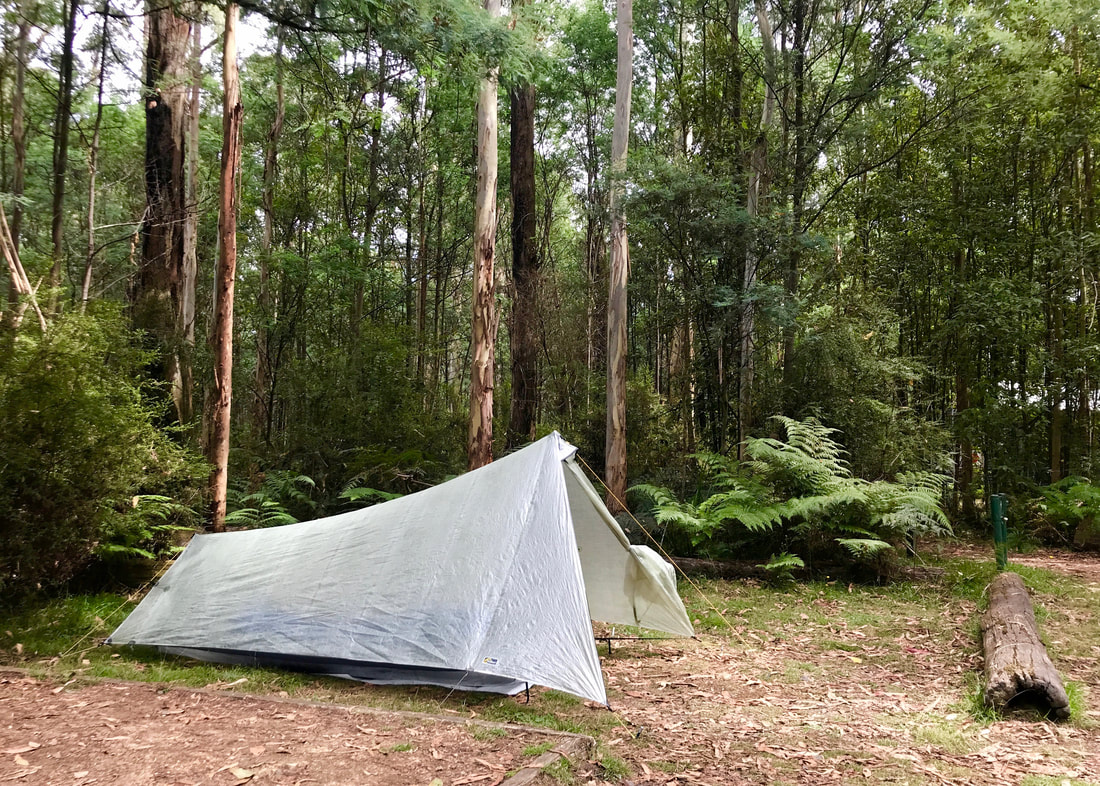
A pretty nice spot in amongst the eucalypts, acacias and ferns.
- Experiments. See pics below. I brought a bit of plastic along as a groundsheet (something we got as part of our shipping from the UK to Australia - bonus!), just because I know how spiky the twigs can be in the Australian bush and I don’t really want to get a hole in the bottom of the tent. This worked (though it might have been fine anyway) but I do need to cut it down to width so it doesn’t collect rain/splashback. I also used Dan’s sleeping mat (Sea to Summit Etherlite), which is full length and thicker than mine (Thermarest Prolite ¾ length). It was slightly more comfortable, but it’s noisy and the bulkiness of it when inflated means there’s not much room in the tent for things like a hiking pack. I think I’ll stick with mine for any overnight walks.
- Pitching. I wasn’t able to pitch on the camping pad because the ground was rock hard. Instead I took the space beside it - which would have been my preference anyway as there was light grass cover. The tent went up easily and I didn’t have to fiddle around too much, except adjusting the height of the front trekking pole. I used two extra side guy outs at the front, which helped in the rain (though I could have made them tauter - see below).
 Showing the (possibly redundant) plastic groundsheet. | 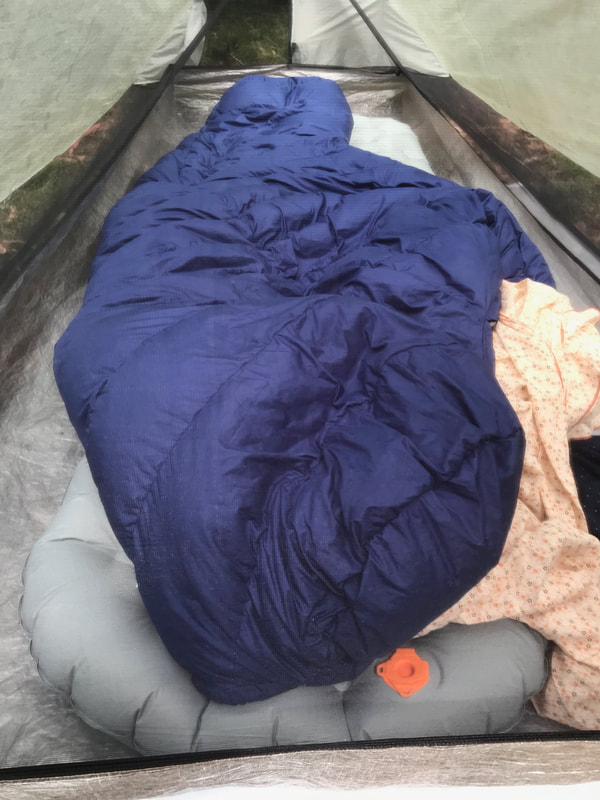 This sleeping mat is too bulky for me. |
- Rain. Good news: the tent is still waterproof! That being said, I did get damp from (a) the internal condensation spraying off the walls when it was raining heavily outside and (b) the splashback from rain and runoff coming in under the walls and through the mesh (pics below). There’s not much I can do about the first issue, and it’s not that bad. The splashback could be mitigated by getting the pitch tauter so the walls come further out from the floor. Interestingly, despite Dyneema being a material that doesn’t ‘wet out’ (i.e. no water is absorbed into it), the combination of water on the walls and - perhaps more importantly - on the mesh around the base meant that the walls grew heavier during the night of rain and started sagging inwards. However, you do want the mesh to sag a little bit, rather than channeling all the runoff into the tent!
- Guy lines. I need to get some better cord to attach to the extra guy points at the side - the old stuff I used 'temporarily' is bulky and heavy. I also didn’t notice before (because I usually have the door rolled back), but there is an extra guyout tab in the middle at the front - I’ll add a little line there for rainy days, to help keep water off my pillow! I’m also considering cutting longer lengths for the front post guy out and the two front corners, just to give a bit more flexibility when the ground is rocky/hard and/or uneven - at the moment I’ve only got a few centimetres of leeway if my peg strikes a rock.
 Splashback on the door and sleeping mat. | 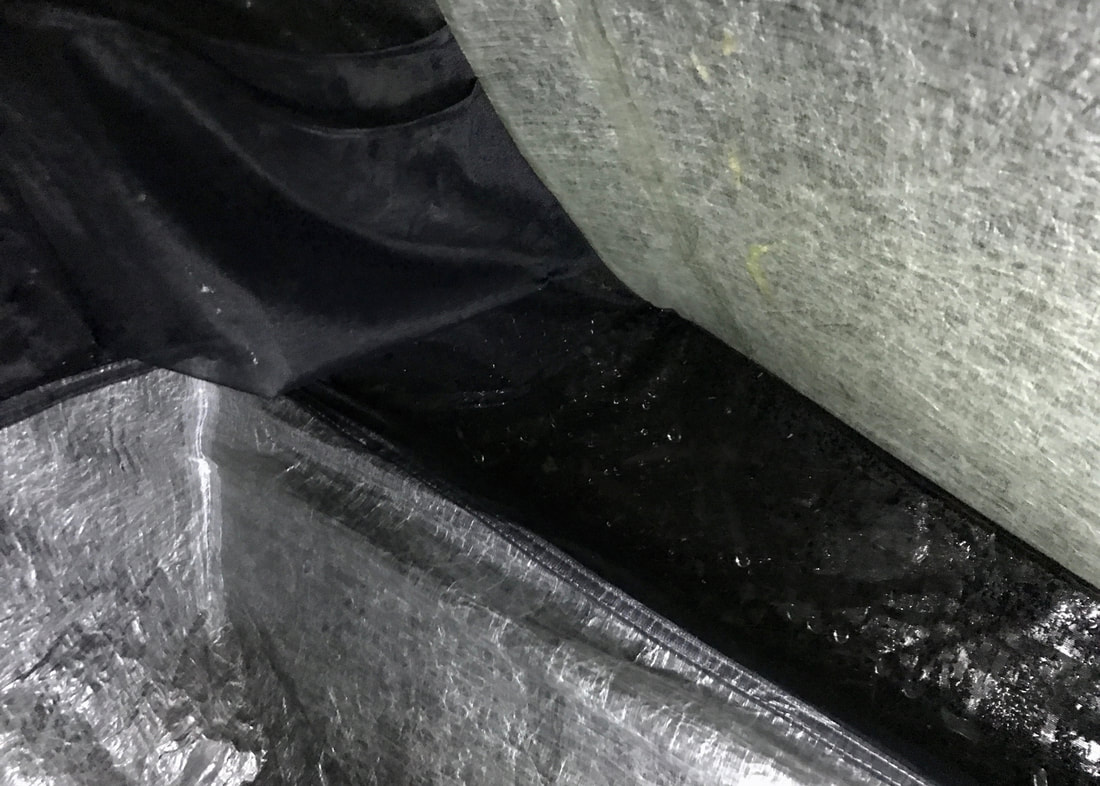 Not a great pic, but see how the mesh is saturated and pulling everything down? |
It was a lovely, relaxing camp with friends, and the tent kept me relatively dry and comfortable. I think I’ve said before, but the Tarptent Protrail Li is easy to pitch, but it’s difficult to pitch really well. We were in a sheltered site and there was no wind to speak of. In rainy and windy conditions, it might have been a very different story!
Heysen Trail
I walked (most of!) the Heysen Trail in August and September 2022. I was out there for over 50 days, and spent 14 nights in my tent. (Other nights were spent in huts, shelters, cabins, pubs, a hostel, a B&B and an Airbnb.)
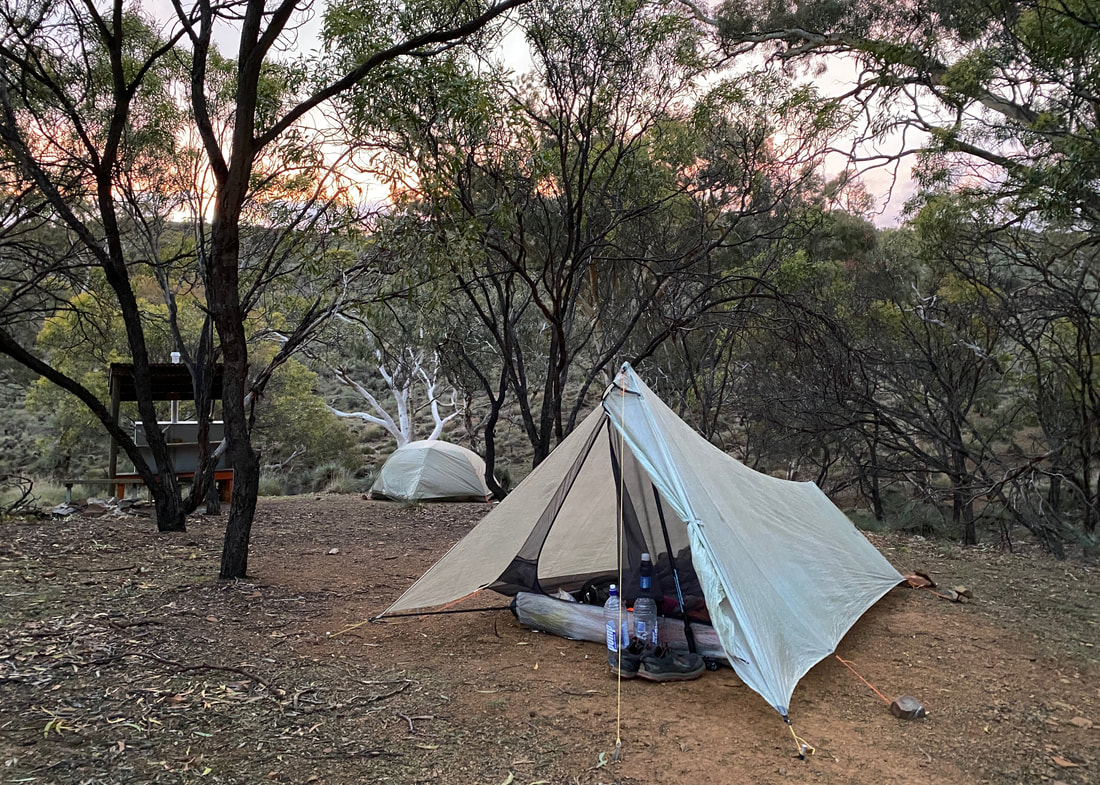
Drying out a bit of washing at Wilpena Pound. This was only the second time I pitched on this trip, and I think you can tell!
What went well:
- I love how light this tent is, and I was often extremely glad that I wasn’t carrying (at least) twice as much weight for my shelter.
- I like how quick it is to pack up. Compared to most others I met on the trail, I tend to be an early starter and a slower walker. This tent helped me get out of camp before everyone else most days.
- No leaks. The tent kept the rain out during a couple of storms. Of course, it didn’t work so well when camped in a cloud/fog, and general condensation was still an issue.
- Rubbish bag groundsheet. My emergency blanket groundsheet ripped in half within the first week or so. Luckily, my lateral thinking and a hostel owner’s generosity nabbed me a couple of thick plastic rubbish bags to use instead. These lasted for the rest of the trip. I might try to get some Tyvek, though.
- Guy lines. I was glad that I put longer tie outs on all the extra tabs, because I needed them in the wind.
Camped in the creekbed to avoid the prickle-infested Calabrinda Creek campsite proper.
What didn’t go so well:
- Pitching on hard (and soft) surfaces. This only happened a few times, and I managed to find alternative spots to set up, but I envied my walking companions and their freestanding tents. I occasionally needed to pitch with rocks on one or more pegs to keep enough tension due to soft, sandy soils. I didn’t end up having to pitch on a platform, but they would also have been a real pain for me to deal with.
- Worry. I worried a lot about getting my sleeping bag wet due to brushing against the walls, pushing the floor out under the wall and getting rain inside, splashback, and so on. I worried about not being able to pitch at any given campsite due to surface, slope, etc. I worried about the wind changing direction and blowing the pegs out or damaging the tent (which happened to someone with the same tent who I met walking in the opposite direction).
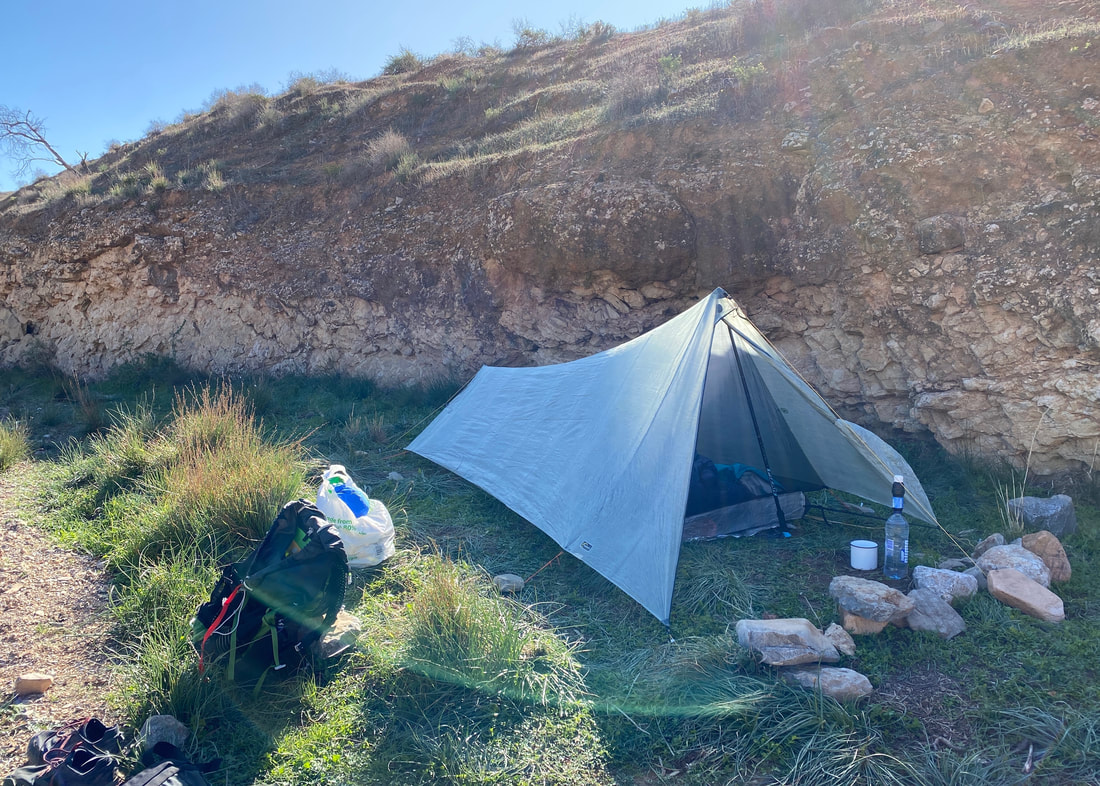
Pitched at the bottom of Mt Arden, where we feared we'd get a lot of wind. The tent held up fine (with the rocks on the guylines).
I initially bought the ProTrail Li with this trip in mind. So, was it worth the expense?
I carried the tent for the whole walk and only used it for a quarter of the nights. On the one hand, it was definitely worth it, because I would have resented lugging a much heavier tent around and only using it one night in four. On the other hand, maybe I would have camped more if I’d had a tent that was roomier, more comfortable, easier to pitch/freestanding, sturdier and/or double walled. We endured some pretty shitty weather for a lot of the walk, and I had a lot of anxiety about shelter. I altered my course a few times and spent a lot more money on accommodation than I expected due to this. Perhaps if I’d had a different tent, this wouldn’t have been such a concern. But ultimately, the tent worked and I didn’t have any disasters. I loved seeing it set up as I cooked dinner on the few peaceful evenings I enjoyed. Home!
I carried the tent for the whole walk and only used it for a quarter of the nights. On the one hand, it was definitely worth it, because I would have resented lugging a much heavier tent around and only using it one night in four. On the other hand, maybe I would have camped more if I’d had a tent that was roomier, more comfortable, easier to pitch/freestanding, sturdier and/or double walled. We endured some pretty shitty weather for a lot of the walk, and I had a lot of anxiety about shelter. I altered my course a few times and spent a lot more money on accommodation than I expected due to this. Perhaps if I’d had a different tent, this wouldn’t have been such a concern. But ultimately, the tent worked and I didn’t have any disasters. I loved seeing it set up as I cooked dinner on the few peaceful evenings I enjoyed. Home!
 At Go-Cart Track, where I couldn't pitch under the shelter... | 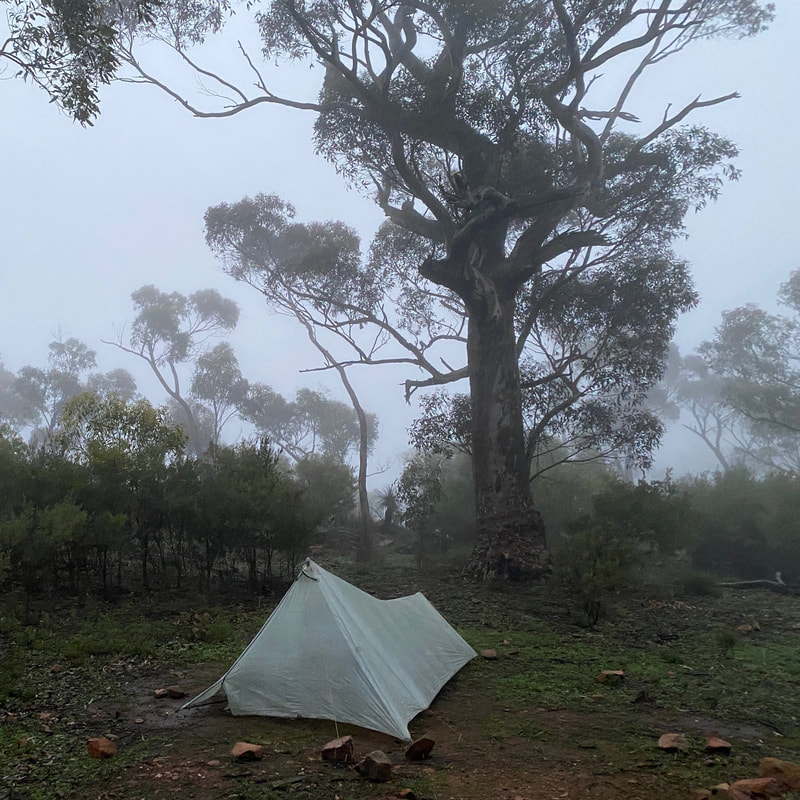 ... and where we woke up in a cloud, with everything damp! |

A fairly unappealing pitch at Greenock Oval, on the flattest spot available.
Another way of asking the question: when I do the Heysen Trail again, will I take a different tent?
Haha. When? Again? Don’t make me laugh! Honestly, having some familiarity with the trail, and with the activity of walking for 6 weeks, would make it such a different experience. (It’s comparable to doing a PhD, in that only doing a PhD could truly prepare you for what’s in store.) Having an idea of what to expect, and now knowing that the ProTrail Li can hold up to quite a bit of weather, I’d probably feel a lot more comfortable overall. But I wouldn’t mind trying out other tents… I guess I’ll have to plan more long walks so I can justify the cost!
Haha. When? Again? Don’t make me laugh! Honestly, having some familiarity with the trail, and with the activity of walking for 6 weeks, would make it such a different experience. (It’s comparable to doing a PhD, in that only doing a PhD could truly prepare you for what’s in store.) Having an idea of what to expect, and now knowing that the ProTrail Li can hold up to quite a bit of weather, I’d probably feel a lot more comfortable overall. But I wouldn’t mind trying out other tents… I guess I’ll have to plan more long walks so I can justify the cost!
Final comments
Let’s talk about the factors I considered before buying the tent as well as the things I noticed in my first few pitches, and give a short update on them with the perspective of longer-term use.
- Weight. It’s so light. I still love this.
- Length and height. Length was never a problem, and I could fit my pack inside with me. I wouldn’t mind a bit more headroom so I could more easily avoid brushing against the condensation-rich walls when getting dressed in the morning.
- Width. A little concerning. I occasionally push things out the side or hit the walls with my feet/knees when turning in my sleep.
- Livable room. Doesn’t really bother me, but as noted, maybe I’d have camped more on the Heysen Trail (especially on rest days) if there was more space in the tent.
- One piece set up. I enjoy this. On short trips it might be handy to set up the inner when the outer is already pitched to avoid rain, but if you’re setting up more than a few nights in a row your tent will get wet regardless.
- Condensation and ventilation. Ventilation is good, especially when there’s a slight breeze. Condensation is bad, but I’ve never met a tent where it isn’t - the main issue is how close the walls are to the sleeping bag.
- Wetting out/drying off. As advertised, the material doesn’t wet out. It still carries water in the creases when packed wet, but it dries out very quickly given a bit of sun and breeze.
- Front/end entrance. It’s a slight irritation once in a while, trying to get in and out around the hiking pole, but I don’t mind it.
- Packability. I usually pack the tent horizontally in my pack, sometimes vertically, occasionally in the back pocket when it is very wet. The packed size isn’t really an issue.
- Transparency. The most annoyed I get with this is when it’s a full moon and a clear night, or when I’m camped at town sites with bright lights.
- Other fabric issues. Isn’t too noisy, hasn’t been damaged.
Trail fam! Daniel and I both envied Elisha's roomy tent, for sure.
- Pocket and clip. There aren't many bells and whistles in this tent, and I would have liked a second pocket on the Heysen Trail. The clip’s fine, I hang my little torch from it sometimes (and often forget it’s there until I pack the tent away).
- Storm flaps. Love that they’re inside so you can open/close without getting damp. In practice, I almost always have these open to help with ventilation.
- Hiking pole setup, not free-standing. See previous section!
- Pitch difficulty. I have probably pitched the tent about 40 times now. It gets easier and I am much better at it now, but I still think it’s easy to pitch, fiddly to pitch well. It’s a bit of a fussy tent on slopes, but in most cases good enough is good enough.
- Bathtub floor. I think they should make this deeper. It’s never really “stood up” at the sides as well as it ought to.
- Wind and guy out points. I use almost all the “optional” guy out points most of the time. Honestly, the lack of points in the middle of the long sides is my least favourite part of the design. I might look into adding some of my own tabs just to help deal with cross winds.
- Cost. Yep, it’s still expensive.
 My little home at World's End (yes!) campsite. |  Beautiful but freezing camp at Smith Hill. |
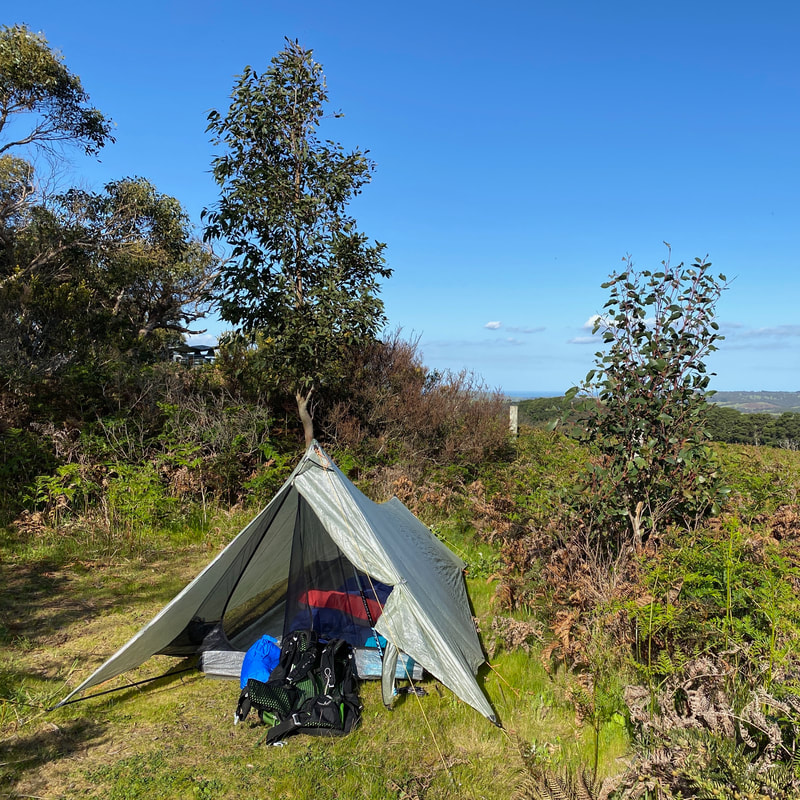
This will likely be the last update I post for this review until/unless I decide to get another tent, as I don’t think I’ll have much more to say on the matter. I hope that this in-depth review has been helpful if you’re thinking about a new tent and are considering the Tarptent ProTrail Li.
 Robinson Hill campsite, with the sea just visible! |  Last pitch of the trail... avoiding the platforms. |
I do review things, occasionally, and will always make it clear when something has been provided to me for free or at a discount for review purposes. This tent was definitely not provided for free or at a discount (other than the Blem discount available to any purchaser when in stock).


 RSS Feed
